

Reference
 Links
Close
Links
Close
Manual 4 Color Screen Printing Machine (T-shirt printing machine) Assembly/Printing Tutorial
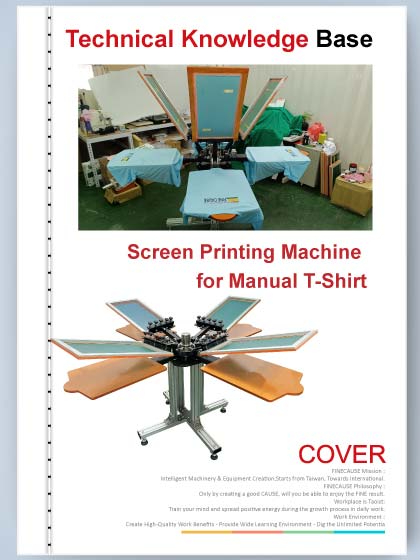
Manual 4 Color Screen Printing Machine (T-shirt printing machine) Assembly/Printing Tutorial - FA-T404

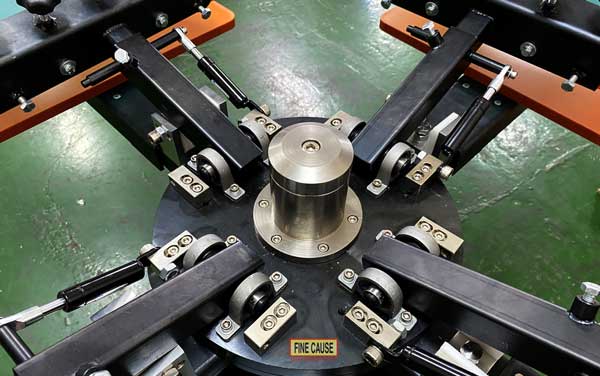
■ Manual 4-color screen printing machine assembly tutorial
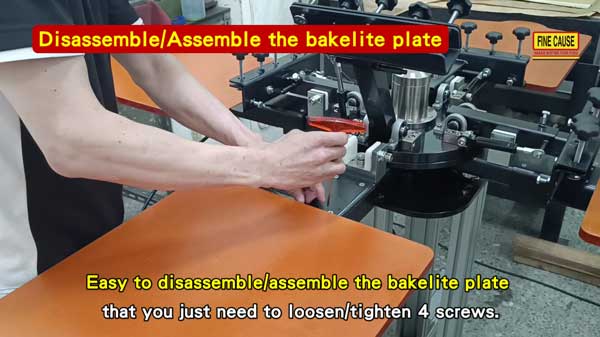
How to disassemble and assemble the bakelite plate of the screen printing machine?
-
Easy to disassemble/assemble the bakelite plate that you just need to loosen/tighten 4 screws.
-
A sturdy and durable bakelite workbench features superior durability.
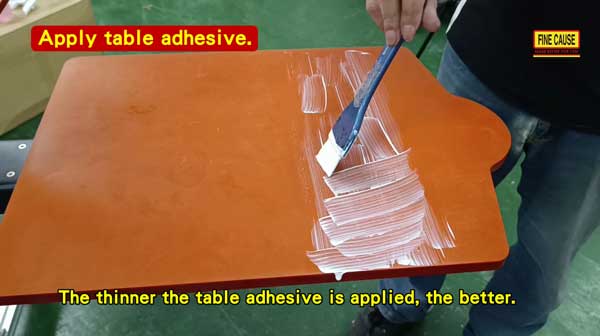
■ Does the table adhesive need to be applied?
-
Applying table adhesive can secure the printing object and the object is easy to be removed from the plate surface without damaging the adhesive, enhancing its reusability compared to regular products.
-
Before applying table adhesive on the bakelite plate, all clutter on the plate must be cleared.
-
The thinner the table adhesive is applied, the better.
-
The table adhesive has good resistance against water, so it is easy to recover from lack of adhesion by rinsing the plate. After drying itself, the table adhesive will regenerate the adhesion.
-
■ Preparation before printing
-
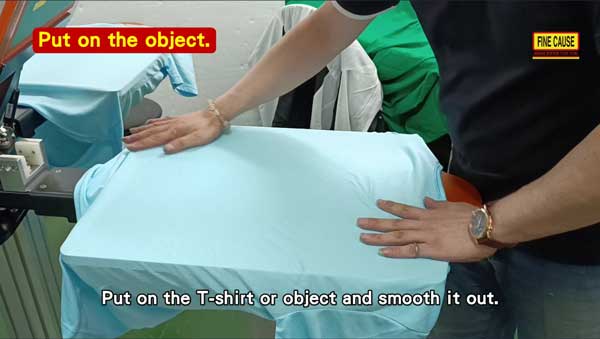
Put on the object - Put on the T-shirt or object and smooth it out.
-
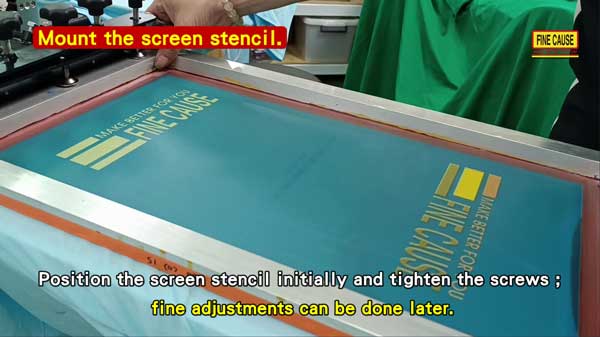
Mount the screen stencil - Position the screen stencil initially and tighten the screws; fine adjustments can be done later.
-
Tighten 4 screen stencils separately.
-
The premium 【bakelite platform】 and 【gas cylinder device】 ensure a stable printing outcome.
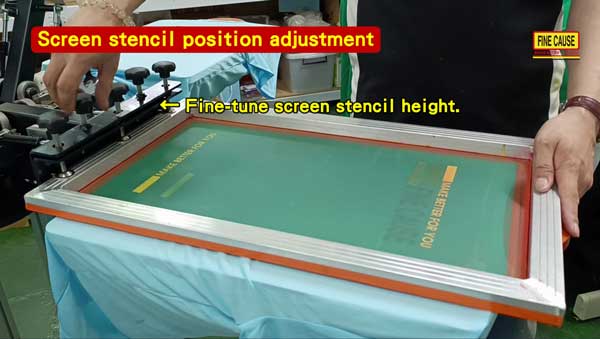
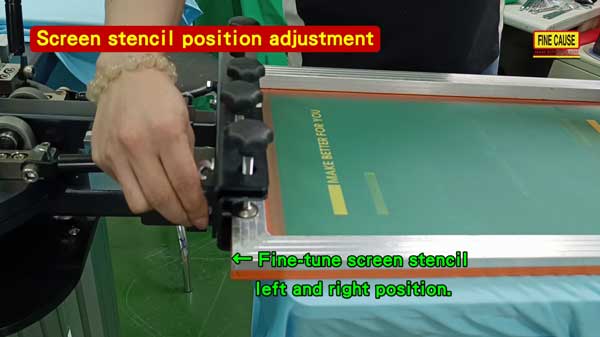
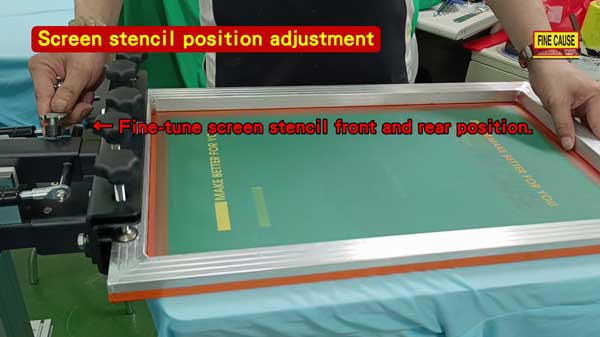
■ Screen stencil position adjustment
-
Fine-tune screen stencil height.
-
Fine-tune screen stencil left and right position.
-
Fine-tune screen stencil front and rear position.
■Actual printing
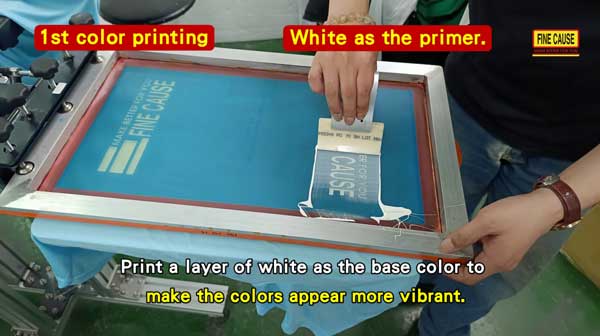
1st color printing - White as the primer.
-
Print a layer of white as the base color to make the colors appear more vibrant.
-
The base color can be printed first, followed by continuous printing of the same color. It's also possible to directly print all 4 colors, as long as you rotate the screen stencil. It is according to your own preference and workflow.
■Drying
-
Drying can be done using a hairdryer or with a specialized T-shirt oven.
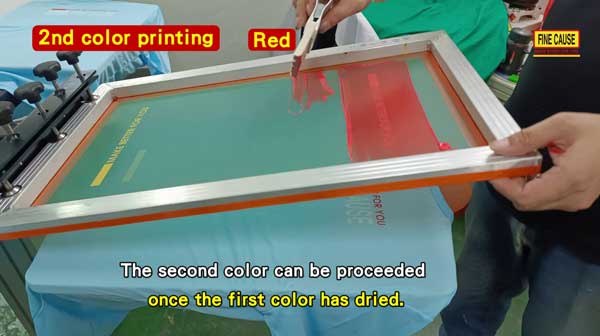
2nd color printing - Red
-
The second color can be proceeded once the first color has dried.
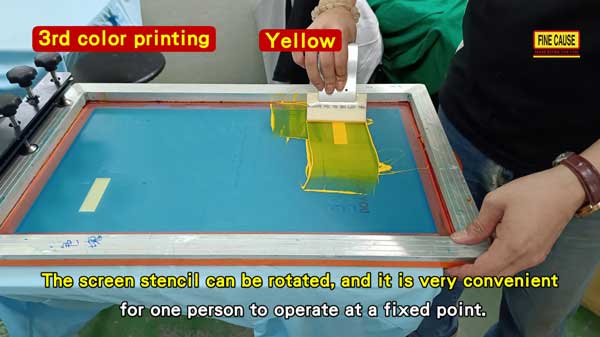
3rd color printing - Yellow
-
The screen stencil can be rotated, and it is very convenient for one person to operate at a fixed point.
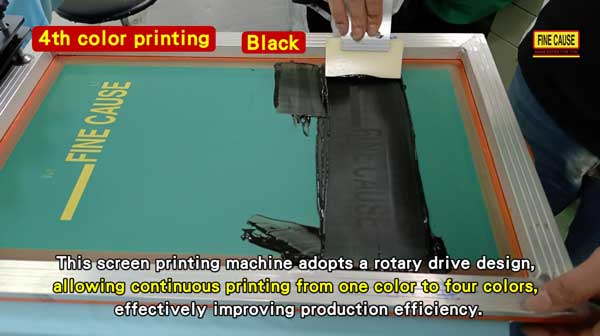
4th color printing - Black
-
This screen printing machine features a rotary drive design with gas cylinder device, making the printer more convenient and durable to use. It also ensures the stability of print quality.
-
It can continuously print in one to four colors, effectively improving production efficiency.
■Finished product
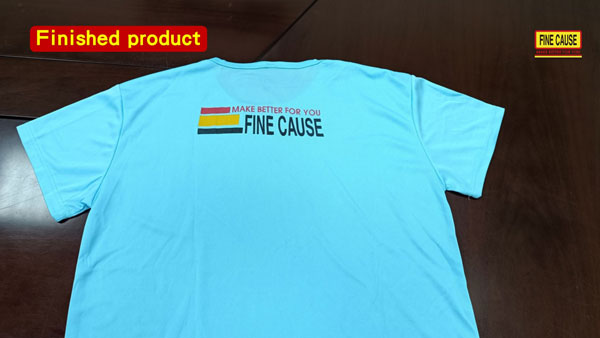
The manual screen printing machine offers a selection of printing 1 to 8 colors.